
Best Strategy to Thrive in Minecraft Hardcore Mode
Introduction
Surviving in Minecraft Hardcore mode is a true test of skill, precision, and preparation. Unlike regular gameplay, where a mistake might cost you some gear or time, Hardcore mode punishes errors with permanent world deletion. For those new to this game mode, the pressure can be overwhelming—but with the right strategy, early decisions, and a structured plan, long-term survival becomes a real possibility.
This Minecraft hardcore survival guide is designed to walk you through the essential first days and weeks of your new Hardcore world. Whether you're aiming to survive your first night or planning a path to diamond armor and enchantments, this tutorial delivers the Minecraft hardcore tips and tricks needed to succeed. From managing early-game risks to efficient mining techniques and villager trading setups, you'll learn how to thrive in a world where every decision matters.
Prioritizing Safety in Your Spawn Area

Maintain a safe perimeter during your initial movements. If you identify any nearby cave systems, increase the distance between yourself and those locations. Avoiding unnecessary risk is crucial, especially when you haven’t gathered resources or crafted basic tools. Staying above ground and sticking to daylight activities during the first few minutes provides the highest survival chance while allowing you to gradually collect essential materials.
Collecting Tools and Resources Efficiently
Efficiency in resource gathering is critical in Hardcore mode. Begin by collecting four to five logs—just enough to craft a crafting table, sticks, and a wooden pickaxe. Avoid spending unnecessary time punching wood with your fists. With your wooden pickaxe, dig directly downward in a staircase pattern until you hit stone. From there, quickly gather enough cobblestone to upgrade your tools and craft a furnace. This allows you to immediately transition from wooden to stone gear, increasing your efficiency and survivability.
Once stone tools are secured, the next priority should be food. Hunger drains faster in Hardcore, and regenerating health depends on having a full hunger bar. Use your new stone sword or axe to hunt nearby animals, prioritizing steak, pork, or cooked mutton for higher saturation. Aim for at least 10 to 15 food items before sunset. Simultaneously, collect wool from sheep to craft a bed. While respawn points aren’t relevant in Hardcore, sleeping through the night is vital to prevent hostile mob spawns.
Establishing a Temporary Shelter Before Nightfall
Sleeping before mobs spawn is crucial. Keep an eye on the sun's position and prepare to sleep as early as the game permits. If you're caught outside at night without gear, a single skeleton or creeper can end the run. Inside your base, while food cooks in your furnace, you can craft additional tools or prepare storage chests. This also gives you time to plan the next day’s objectives, such as mining or expanding your resource collection efforts.
Early-Game Coal and Charcoal Solutions
Coal is essential for both smelting and crafting torches, but it’s not always immediately available. If no surface coal is visible in surrounding mountains or caves, use logs to create charcoal. Smelt wood logs in a furnace using wooden planks or tools as temporary fuel. Charcoal functions identically to coal and can serve as a long-term solution if no natural coal deposits are nearby.
Craft torches as soon as you have charcoal or coal available. Lighting your base and surrounding area helps prevent hostile mobs from spawning, even during brief nighttime exposures. Place torches strategically inside and outside your shelter, spacing them roughly every 9 to 10 blocks. Prioritizing lighting significantly reduces the risk of surprise attacks during your initial days in Hardcore mode.
Building a Mine for Sustainable Progress
To progress efficiently in Hardcore, begin constructing a personal mine. A staircase mine is one of the safest early-game mining methods, as it reduces the risk of sudden falls and mob ambushes. Dig down at a shallow angle until you reach deeper layers, such as Y-level 15 for iron or -58 for diamonds. Avoid exposed cave systems while digging; these areas may contain valuable resources but often include unlit, mob-filled zones.
If you encounter an open cave while mining, either change your dig direction or safely bridge across it. Use cobblestone to create narrow, elevated paths that avoid direct confrontation with mobs. When navigating around or above cave systems, always light up the area and place blocks behind you to prevent sneak attacks. Bring a bed along during mining sessions to skip nights, keeping surface mobs from spawning and ensuring a safer return route.
Strip Mining Strategy for Core Resources
Once your staircase reaches the intended depth, set up a basic strip mine. This involves digging a central tunnel with 1x2 side tunnels branching off every two blocks. This method maximizes resource exposure while maintaining efficiency and safety. Place torches regularly within both the main and branch tunnels to maintain a mob-free environment. Mining in well-lit, confined spaces is a much safer alternative to exploring open cave networks, especially in Hardcore mode.
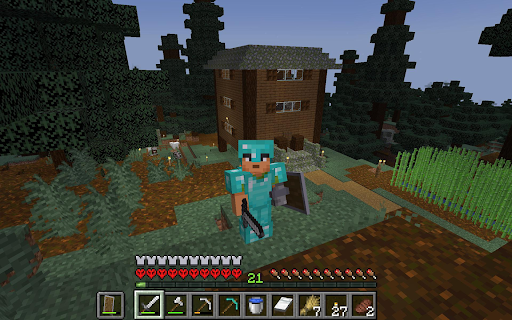
Focus on acquiring enough iron to craft a full set of armor, a shield, and basic iron tools. With iron gear equipped, you gain significantly better defense and damage output. Also, continue collecting coal or charcoal during this phase to maintain a steady torch and furnace fuel supply. Once geared, you’re in a stronger position to tackle more advanced activities like expanding your base or exploring new areas.
Upgrading Your Base and Adding Defensive Structures
With basic gear and a stable supply of resources, it's time to enhance your home base. Start by replacing temporary shelters with a more permanent structure using stone, wood, or other durable materials. Design the layout to include separate rooms for storage, crafting, and sleeping. Build walls around your base perimeter to prevent mobs from entering. Fences or cobblestone walls can serve this purpose effectively, especially when paired with gates or iron doors.
Lighting remains essential—place torches or lanterns around your base exterior to cover all dark spots. Consider creating a rooftop access point or watchtower to monitor the surrounding area, helping you spot potential threats early. A fortified base reduces risk during both active gameplay and idle periods, allowing you to focus more on gathering materials, planning builds, or engaging in combat safely.
Exploring Deeper or Trading for Diamond Gear
Now that your setup is secure, you can begin aiming for higher-tier gear. There are three main paths to obtaining diamond armor: strip mining at lower Y-levels, exploring deep caves, or trading with villagers. Strip mining remains the safest but can be time-consuming. If you choose to explore caves, always bring sufficient food, torches, and a shield. Move slowly, keep an exit path clear, and avoid engaging mobs unless necessary.
Trading offers an alternative route. Locate a nearby village or transport villagers to your base using boats or leads. Convert unemployed villagers into armorers and librarians using job site blocks like blast furnaces and lecterns. With enough emeralds and reputation, you can acquire enchanted diamond gear through trades. This approach minimizes risk while maximizing equipment quality, making it a strong option in any Minecraft hardcore strategy.
Setting Up a Villager Trading Hall
Creating a villager trading hall is a long-term investment that pays off in multiple ways. Start by building individual stalls or workstations for each villager, assigning them roles such as librarian, armorer, toolsmith, or farmer. This setup allows controlled, reliable access to essential items like enchanted books, weapons, and gear upgrades. Breeding villagers is simple—provide them with beds, food (bread, carrots, potatoes), and access to workstation blocks to encourage population growth.
Prioritize librarians early on, as they offer enchantments like Mending, Efficiency, and Protection. You can refresh their trades by breaking and replacing lecterns until they offer desired books. Once established, a well-organized trading hall becomes your primary hub for acquiring top-tier equipment and enchantments without the risks of cave exploration or extended mining.
Efficient Experience Farming for Enchantments
Gaining experience (XP) is essential for enchanting tools and armor. While fighting mobs at night can yield XP, it comes with inherent risks. Safer alternatives include building an AFK fish farm or breeding animals. An AFK fish farm lets you collect XP and potentially rare enchanted books while idle—just be sure to build it in a secure, enclosed space to avoid mob attacks during downtime.
Another viable XP method is setting up a mob grinder using a dungeon spawner if you locate one. Automating XP collection through safe means ensures steady progress without constant danger. With XP collected, use an enchanting table or anvil to apply enchantments, making your tools and armor more durable and effective in combat, exploration, and mining.
Advancing Toward the Nether and Farming Systems
Once your gear is enchanted and your base is well-fortified, you’re ready to expand into mid- to late-game activities. The Nether provides access to vital materials like blaze rods and nether wart for potion brewing. Before entering, ensure you have full enchanted armor, a shield, and sufficient food. Bring blocks to build protective barriers and mark your portal location clearly to avoid getting lost. Travel cautiously, avoiding confrontations with piglin brutes and ghasts whenever possible.
Back in the Overworld, begin developing sustainable food sources. Create crop farms for wheat, carrots, and potatoes, and automate them where possible using redstone or water-based systems. Add animal pens for renewable meat and leather. These systems reduce dependency on foraging and allow more freedom to explore, mine, or expand. By this stage, your Minecraft hardcore survival guide is in full effect—you’re operating from a position of strength with strong gear, secure resources, and a strategic foothold for future challenges.
onclusion – Staying Ahead in Hardcore Survival
Surviving and thriving in Minecraft Hardcore mode requires more than basic knowledge—it demands precision, discipline, and a proactive approach. From avoiding high-risk biomes and securing early resources to crafting a fortified base and establishing villager trade networks, each step plays a vital role in long-term success. Unlike casual gameplay, Hardcore does not forgive mistakes, making preparation and timing the most important tools at your disposal.

Whether you're mining strategically, trading for enchanted gear, or automating your food supply, every choice you make should align with minimizing risk while maximizing efficiency. By following the tactics outlined in this guide, you'll significantly improve your chances of surviving past the critical early phase and building a world that reflects both resilience and strategy. This guide provides a complete framework for anyone aiming to master Hardcore—implement these Minecraft hardcore tips and tricks, and you'll be on your way to conquering one of the game's most intense challenges.
🎮 Level 99 Kitchen Conjurer | Crafting epic culinary quests where every dish is a legendary drop. Wielding spatulas and controllers with equal mastery, I'm here to guide you through recipes that give +10 to flavor and +5 to happiness. Join my party as we raid the kitchen and unlock achievement-worthy meals! 🍳✨ #GamingChef #CulinaryQuests
For More, Visit @https://haplogamingcook.com


No comments:
Post a Comment